
How to Draw Luffy's Cheerful Smile Front View
Learn how to draw Monkey D. Luffy in a cheerful front-facing anime portrait with wide eyes, a big open smile, visible teeth, messy hair, and his signature straw hat.
In this lesson, we are going to draw Monkey D. Luffy from the front view with his bright cheerful smile. This portrait is all about energy and personality. Luffy should feel friendly, loud, and full of adventure, so we will focus on the big open mouth, wide eyes, simple face shape, messy hair, and straw hat.
We will start with light construction guidelines to keep the head centered. Then we will place the eyes, nose, ears, mouth, and straw hat. After that, we will refine the hair, hat brim, teeth, collar, and final expression. The goal is not to make the drawing stiff or overly perfect. Luffy's charm comes from his simple shapes and happy expression.
Take your time with the mouth. The smile is the most important part of this drawing. Keep the teeth clean, the eyes open and cheerful, and the straw hat balanced across the top of the head. If the face feels happy before you add the final lines, you are on the right track.
Tools Required
- 2H Pencil for light guidelines
- HB Pencil for sketching
- 2B Pencil for darker facial lines
- 4B Pencil for mouth and hat shading
- Fine-Liner Pen or dark pencil for final outline
- Kneaded Eraser
- Ruler
- A4 Drawing Paper
Step-by-Step Instructions
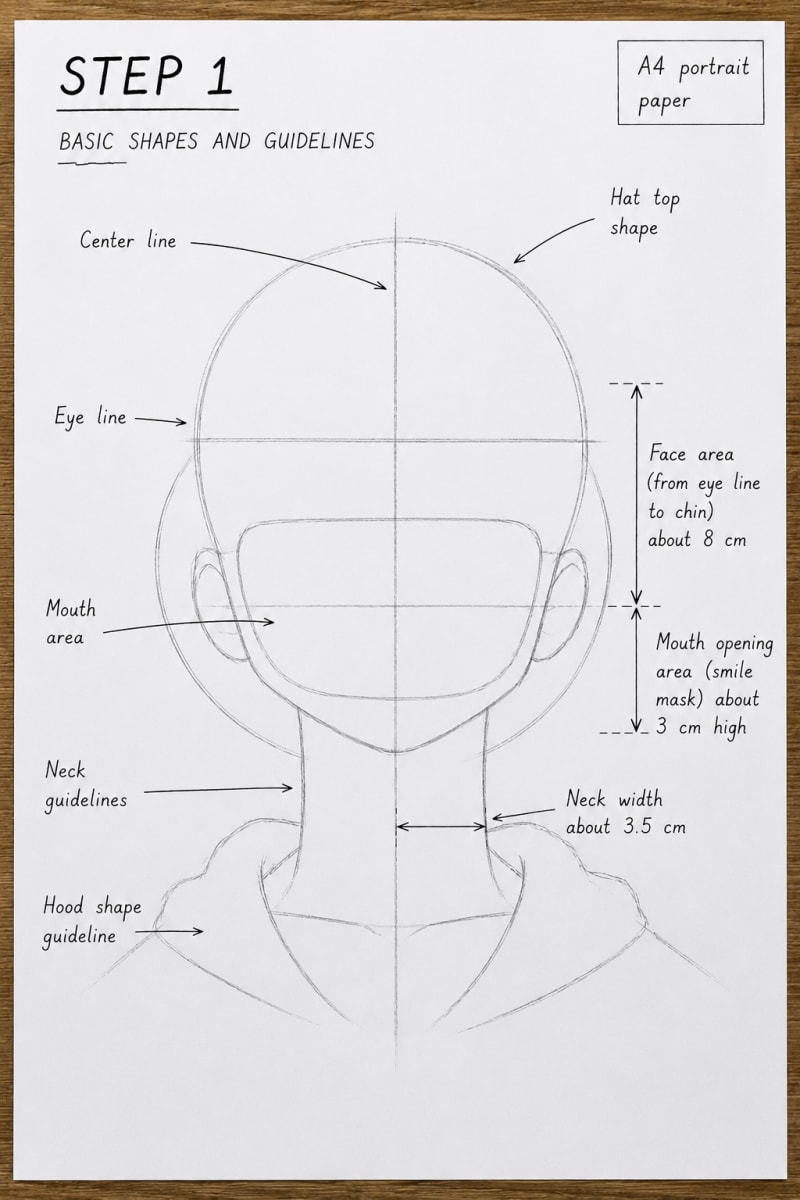
Build the Basic Head Shape and Hat Guidelines
Focus: GuidelinesStart with a light oval for Luffy's head. Use a 2H pencil and keep the lines soft because this first stage is only for construction. Draw a vertical center line down the face, then add a horizontal eye line across the upper half of the head. Sketch the lower face with a simple rounded jaw and small chin. Luffy's face should not look too sharp here. He has a friendly, open expression, so keep the face shape simple and relaxed. Add the neck and shoulder direction lightly underneath. Now place the straw hat guide above the head. Draw the brim as a wide curved shape crossing the top of the forehead, then mark the top dome of the hat above it. Keep the hat balanced from left to right. Before moving on, check that the center line, eye line, mouth area, and hat brim all feel level.
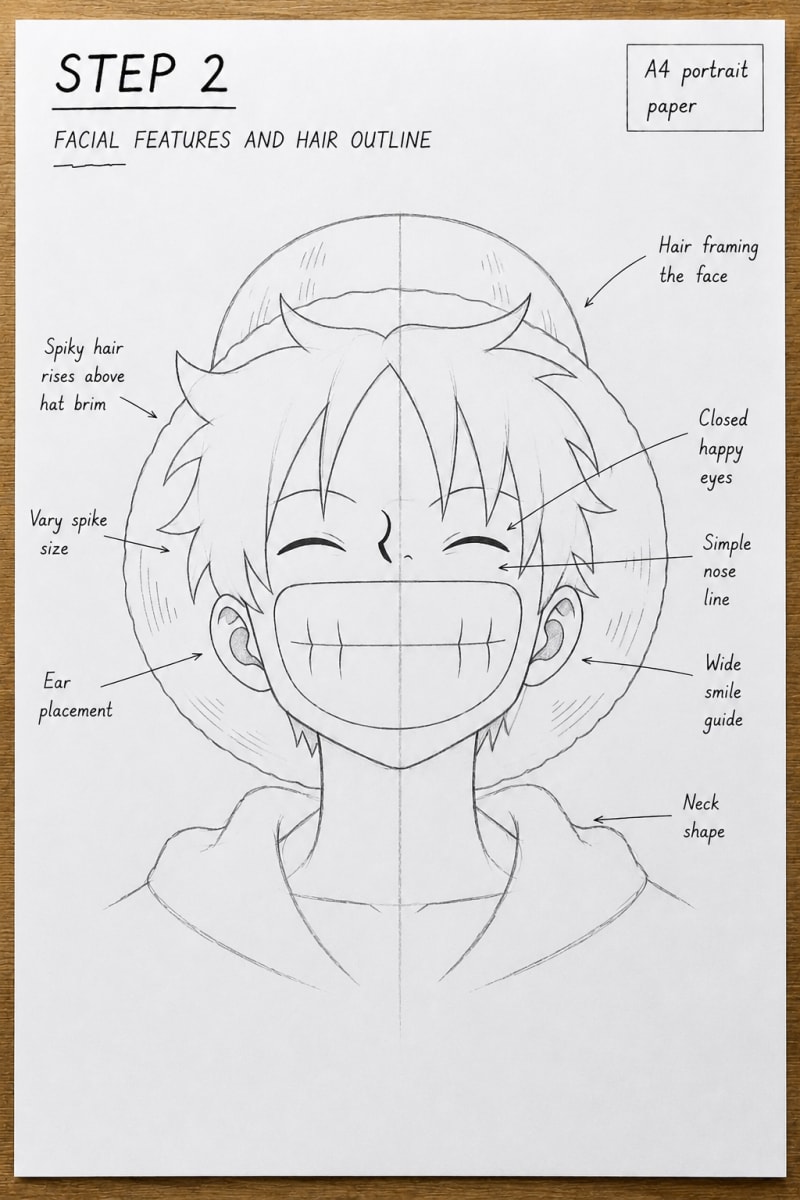
Place the Eyes, Nose, Smile, and Straw Hat
Focus: FaceNow we add Luffy's main expression. Draw the eyes on the horizontal guide line. Keep them wide and cheerful, with simple round shapes that make the face feel open and friendly. Place the small nose on the center line, then draw the large open smile in the lower half of the face. The mouth should be wide, but it still needs to stay centered. Add the upper teeth as a clean curved row across the top of the mouth. Keep the teeth simple; do not draw too many small divisions or the smile will look busy. Add the ears on both sides of the head, then refine the straw hat brim. The brim should sit behind the hair but still clearly frame the top of the face. At this point, Luffy should already look happy before we add the final hair and line art.
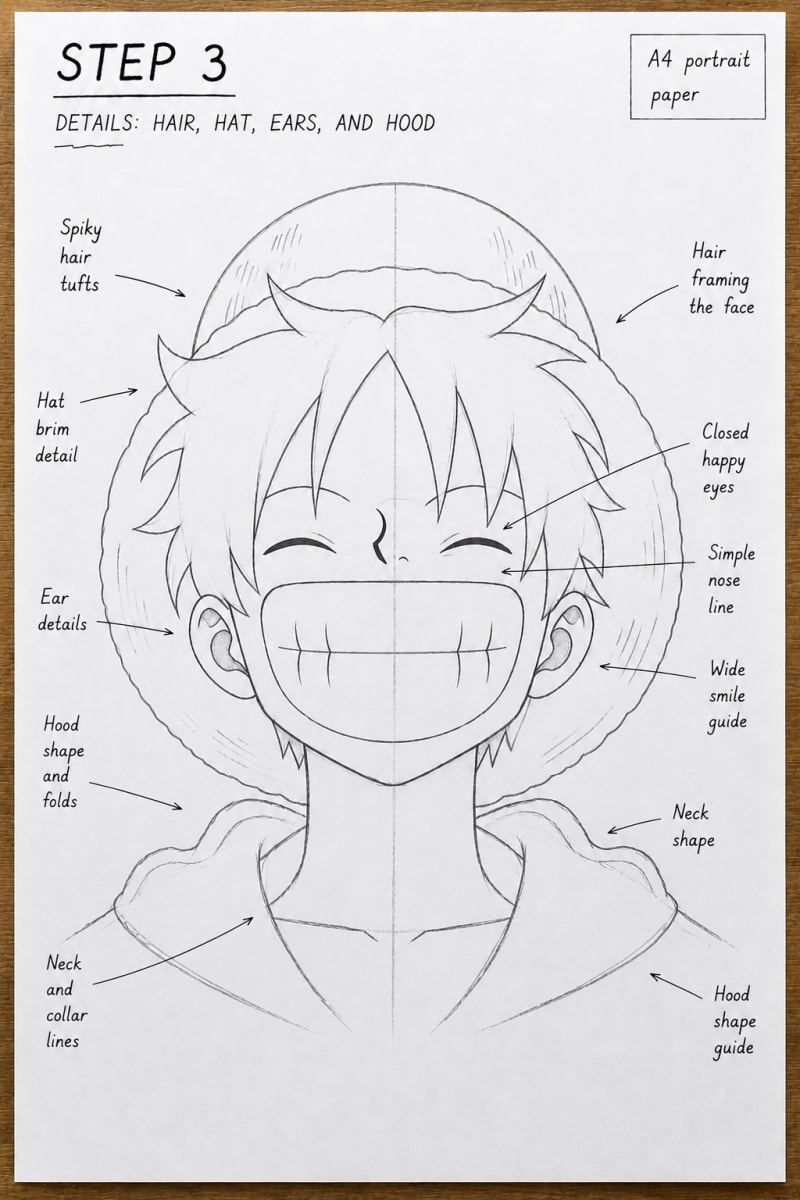
Refine the Hair, Hat Brim, Teeth, and Collar
Focus: DetailsNow refine the drawing before the final clean-up. Add Luffy's messy hair under the straw hat, using small uneven spikes around the forehead and sides of the face. Keep the hair loose and natural. It should not look too neat. Strengthen the straw hat shape by cleaning the brim and crown curve. Make sure the brim sits evenly across the head and does not hide too much of the face. Then improve the open smile by clarifying the teeth, tongue area, and mouth shape. Sketch the neck, collar, and shoulder lines more clearly. At this stage, the portrait should already show Luffy's cheerful personality, even if some construction lines are still visible.
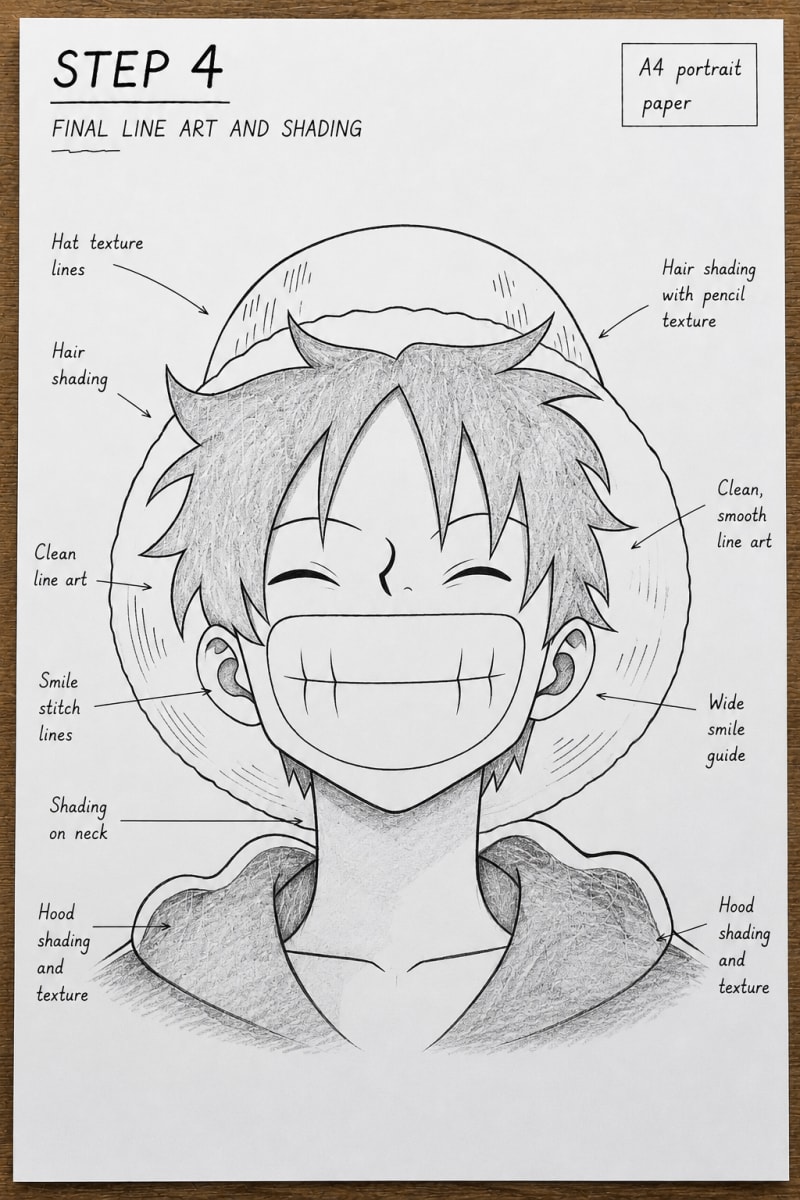
Complete the Final Line Art and Shading
Focus: ShadingNow complete the drawing with clean final line art. Darken the outline around the straw hat, hair, eyes, ears, jaw, open mouth, neck, collar, and shoulders. Keep the teeth bright and clean so the smile stays cheerful. Shade the inside of the mouth with a darker pencil, then add softer shading under the hat brim, under the chin, around the hair, and near the collar. Do not over-shade the face. Luffy's expression should stay bright and energetic. Finally, erase the remaining construction lines carefully. The finished portrait should feel lively and friendly, with the wide open smile and straw hat as the main focus.
Is this Luffy drawing tutorial good for intermediate artists?
Yes. This guide is best for intermediate artists because we are drawing a big open smile, balanced front-view features, visible teeth, messy hair, and Luffy's straw hat. The shapes are simple, but the expression needs careful control.
How do I make Luffy's smile look cheerful?
Make the mouth wide and centered, keep the teeth clean, and draw the eyes open and friendly. The smile should feel relaxed and energetic, not scary or forced. Keep the corners of the mouth lifted.
How should I draw Luffy's straw hat?
Start with the brim as a wide curved shape across the top of the head. Then add the dome of the hat above it. Keep the hat balanced on both sides and let some hair pieces show underneath the brim.
Where should I add shading in this Luffy portrait?
Add darker shading inside the mouth and light shading under the hat brim, under the chin, around the hair, and near the collar. Keep the face mostly clean so the cheerful expression stays bright.
Why does my Luffy drawing not look like him?
Check the straw hat, wide smile, simple eyes, and messy hair. If the hat is too small, the mouth is not centered, or the eyes look too serious, the portrait may lose Luffy's cheerful personality.