
How to Draw Killua's Determined Gaze Front View
Learn how to draw Killua Zoldyck from Hunter x Hunter in a clean front-view anime portrait, focusing on face guidelines, large eyes, spiky hair, line art, and soft pencil shading.
In this lesson, I will walk you through how to draw Killua Zoldyck in a front-facing anime portrait with his calm but determined expression. We will keep the drawing simple enough to follow, but still detailed enough to capture what makes Killua recognizable: the soft round face, sharp anime eyes, messy white spiky hair, small nose, quiet mouth, and light neck shading.
Start lightly. Do not rush the final lines. The goal is to build the face step by step, the same way I would teach you on paper: first the head shape and guide lines, then the eyes and facial placement, then the hair construction, and finally the clean outline with shading. If your first sketch looks too plain, that is normal. Killua's character appears when the eyes, hair volume, and soft shadows come together.
Use the images for each step as your reference while you draw. Pay close attention to the center line, the eye axis, and the way the hair sits above the skull instead of sticking flat to the head.
Tools Required
- 2H Pencil for light guidelines
- HB Pencil for sketching
- 2B Pencil for darker facial lines
- 4B Pencil for soft neck and hair shadows
- Fine-Liner Pen or dark pencil for final outline
- Blending Stump or tissue
- Kneaded Eraser
- Ruler
- A4 Drawing Paper
Step-by-Step Instructions
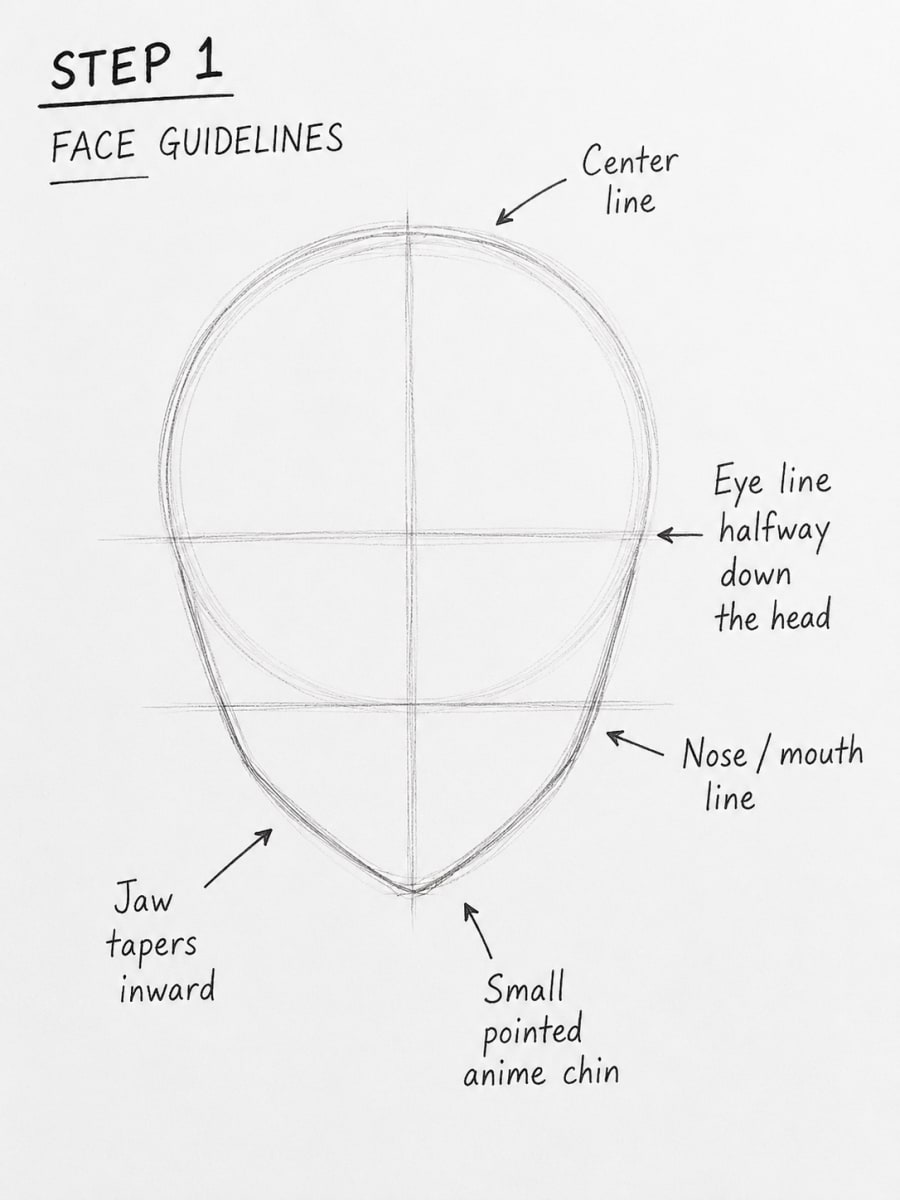
Build the Face Guidelines
Focus: GuidelinesStart with a light oval for the head. Keep your pencil pressure very soft here because these lines are only for construction. Draw one vertical center line down the middle of the face, then draw a horizontal eye line halfway down the head. Next, shape the jaw so it gently tapers inward toward a small pointed anime chin. Do not make the jaw too wide, because Killua has a youthful face with a soft lower half. Add a lower guide line for the nose and mouth area. This helps you keep the features balanced before adding details. Before moving on, check three things: the center line should split the face evenly, the eye line should be level, and the chin should sit directly under the center line. If these are correct, the rest of the portrait will be much easier.
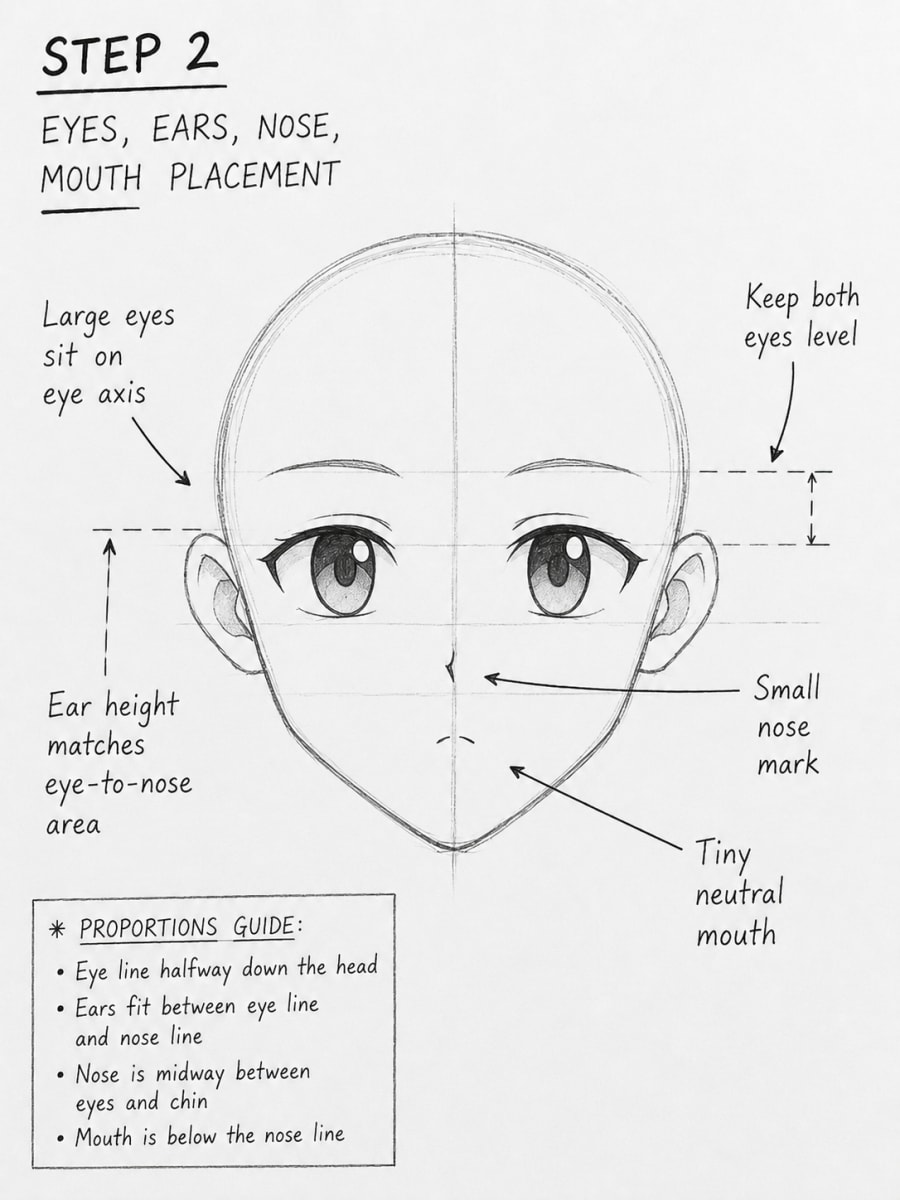
Place the Eyes, Ears, Nose, and Mouth
Focus: EyesNow we place the main facial features. Draw Killua's eyes directly on the horizontal eye axis. Keep them large, calm, and slightly sharp at the corners. The eyes should feel focused, not surprised, so avoid making them too round. Place the ears on both sides of the head. A good rule is to keep the ear height close to the space between the eye line and the lower nose area. Then add a very small nose mark on the center line. For the mouth, draw a short neutral line below the nose. Keep it quiet and simple because Killua's expression is controlled. Take your time with the eyes. Add the iris, pupil, and small highlights. The highlights are important because they make the gaze feel alive. If one eye looks higher than the other, lightly correct it before darkening anything.
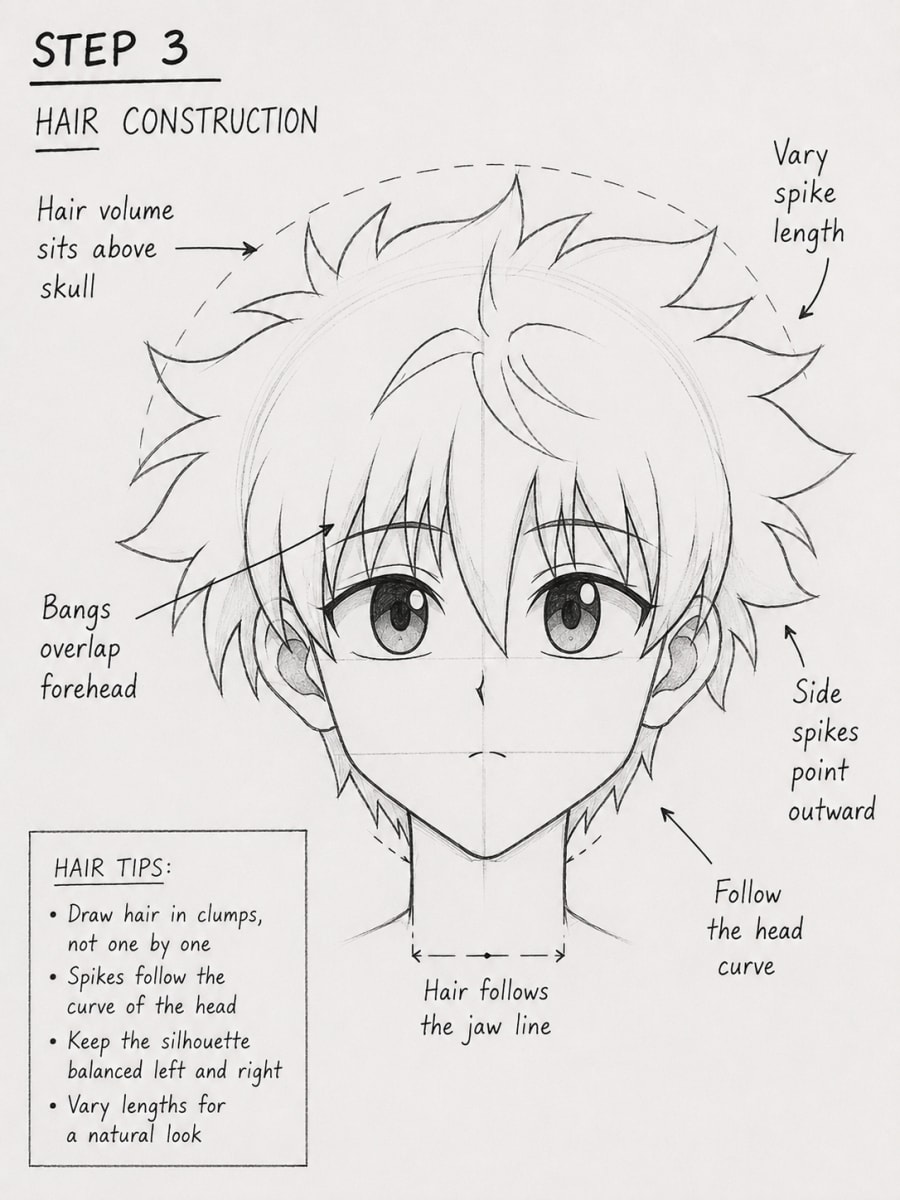
Construct Killua's Spiky Hair
Focus: HairNow draw the hair around the head. Do not place the hair directly on the skull line. Killua's hair has volume, so let it sit above the head shape. Start with the bangs in the middle, letting a few sharp locks fall down toward the eyes. After the bangs, build the side spikes. Some spikes should point outward, some upward, and some slightly downward near the ears. Vary the length of each hair clump so the hair does not look like a repeated pattern. The top spikes should feel messy but still controlled. Use light lines first. Once the overall hair shape looks balanced, darken the outer contour. Keep the face visible. The hair should frame the eyes, not cover them completely.
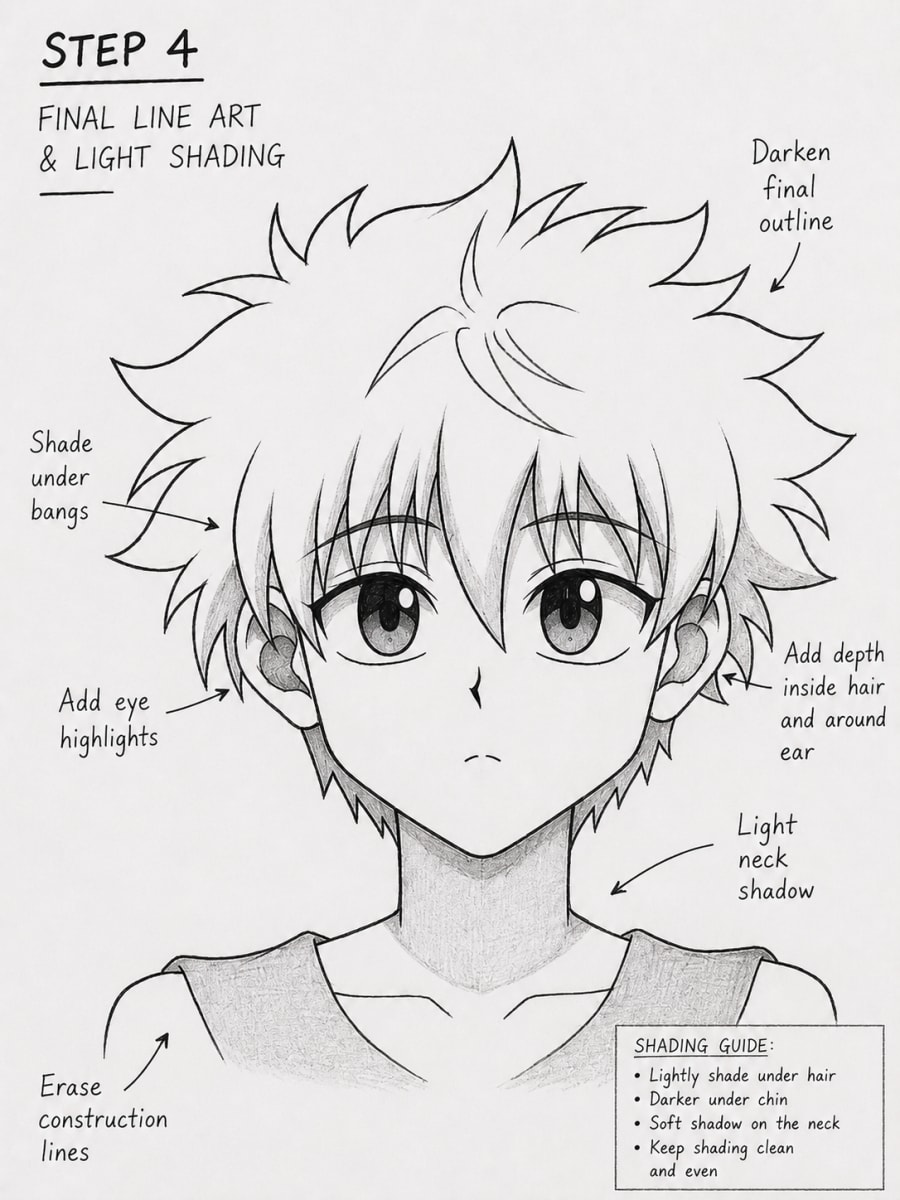
Clean the Line Art and Add Soft Shading
Focus: ShadingIn the final step, clean up the drawing. Darken the main outline around the face, eyes, hair, ears, neck, and shoulders. Use confident lines, but do not press too hard everywhere. Thicker lines work best under the chin, around the hair edges, and on the upper eyelids. Add light shading under the bangs, inside the eyes, under the chin, and along the neck. Keep the shading soft. Killua's hair is white, so do not shade the full hair heavily. Instead, add small shadows where hair clumps overlap and leave most of the hair bright. For the eyes, darken the pupils and keep the highlights clean. Shade the neck with vertical pencil strokes, then blend gently. Finally, erase the construction lines. The finished portrait should look clean, calm, and focused, with Killua's determined gaze as the main point of the drawing.
Is this Killua drawing tutorial good for intermediate artists?
Yes. This lesson is made for intermediate artists. We are not only drawing a simple face; we are practicing eye balance, clean hair shapes, soft shadows, and a calm determined expression. If you already understand basic face guidelines, this guide will help you push your anime portrait to the next level.
How do I make Killua's eyes look determined instead of cute or surprised?
Keep the eyes level on the eye axis, make the upper eyelids slightly heavier, and avoid drawing the pupils too large. A calm mouth and centered gaze will make the expression feel more focused.
How should I draw Killua's spiky hair?
Draw the hair as separate clumps that sit above the skull. Use different spike lengths and directions. The bangs should fall toward the eyes, while the side and top spikes should spread outward to create Killua's messy white hair shape.
What pencil should I use for this anime portrait?
Use a 2H pencil for the light guidelines, an HB pencil for the main sketch, and a 2B or 4B pencil for darker lines and soft shadows. A kneaded eraser helps clean the face without damaging the paper.
Where should I shade this Killua drawing?
Shade lightly under the bangs, inside the eyes, under the chin, and on the neck. Keep most of the hair bright because Killua's hair is white. The shadows should support the face, not overpower it.